Website Builder for Ticket Events
TicketSignup's Website Builder enables your organization to add custom content sections to your free ticket event website. Include images, video, playlists, call-to-action buttons and formatted text to feature additional information about your event on your event’s website. Ticket event websites are easy to create and even easier to manage with the Website Builder.
This page walks through how to navigate the Website Builder and add different content types to your ticket event website, as well as a peek of what’s coming next to the Website Builder!
Navigate to the Website Builder
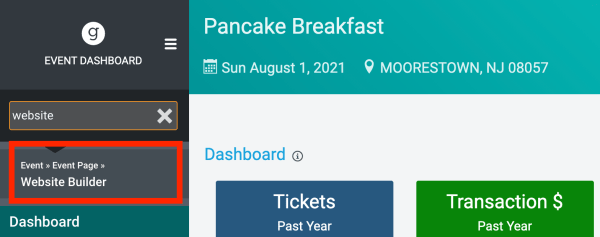
To access the Website Builder, type “Website Builder” into the menu search on your Ticket Dashboard, then click the link to go to the Website Builder.
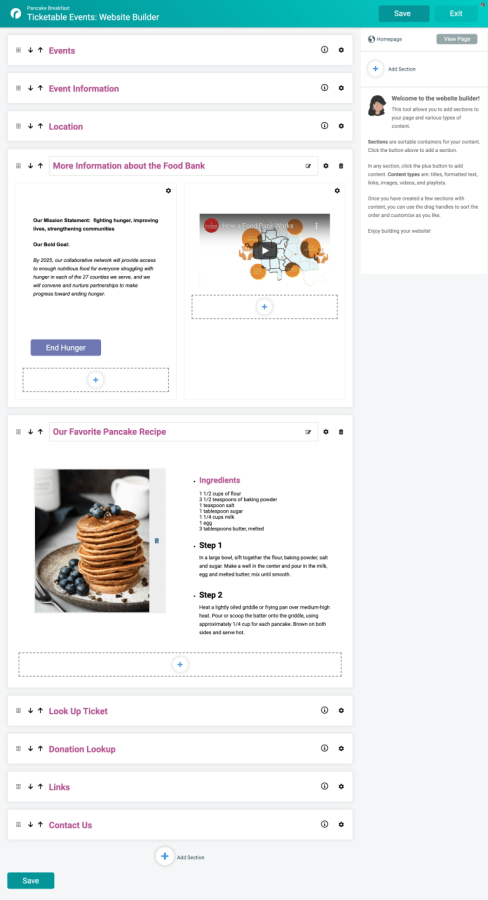
The Website Builder gives you an intuitive and easy interface to add custom sections that feature your content. You will see some default sections that are automatically generated for your website based on information that you completed in the Ticket Wizard. Note that you can still enable a cover page for your Ticket Event website when you use the Website Builder. Your custom content will appear on the Event Info tab of your website.
Rearrange Sections
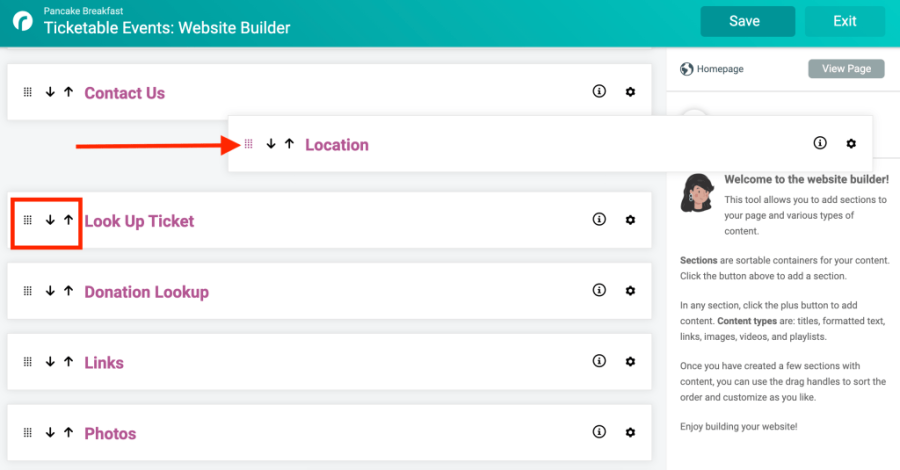
You can easily rearrange the order that content appears on your website. There are drag-and-drop handles on the left side of each section tile to easily move sections around. There are also up-and-down arrows that make it easy to rearrange expanded sections on a desktop or on mobile.
You will have the same options to rearrange the order that content appears within a section. For example, you can rearrange the order that text and a call-to-action button appear within the same section.
Add and Edit Sections
To add a new content section to your website, click Add Section on the right navigation panel. There is also an option to add a new section at the bottom of the Website Builder to make it easy to add more content as you are building your website.

There are two options when you add a section: Single Column or Two Column.
Single Column Section:

Two Column Content Section
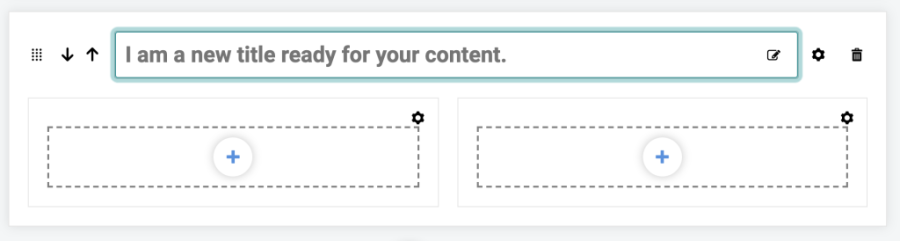
When you create a new section, add a title in the top text box.
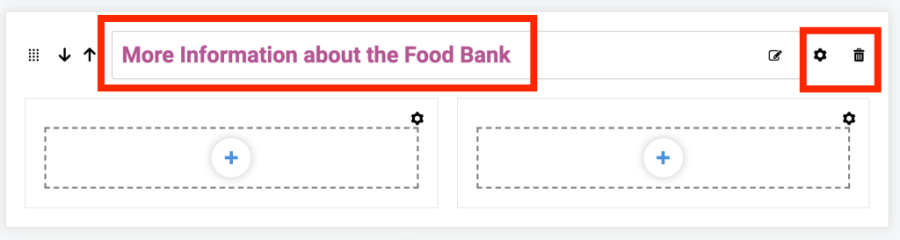 The gear allows you to customize section settings, including adding a section URL that allows you to link to a specific section on the website and an option to hide the section. In the future, we will add more settings, including a publish date so that you can set a specific date or timeframe when you want a piece of content to show. There is also a trashcan to delete a section.
After adding content to a section, you’ll also have the option to customize the background color. Note that the color choices available are linked to your Ticket Event’s theme colors that are set in the dashboard.

Click the plus sign on any section to start adding your content. You can click Save at the top-left of the page at anytime to save your custom sections.
Text
When you add custom text, an editor will appear to give you flexible formatting options, including headers and extensive format options.

Call-to-Action Button
You can add CTA buttons throughout your content sections. Buttons can redirect to common actions on the ticket website, like ticket purchase or the donation page. They can also be used for any custom URL; for example, you may want to link attendees back to your nonprofit’s main website. After adding a button to any section, click Edit Me to customize. The preview of the button will update in real time as you add button text and choose a color.

Image
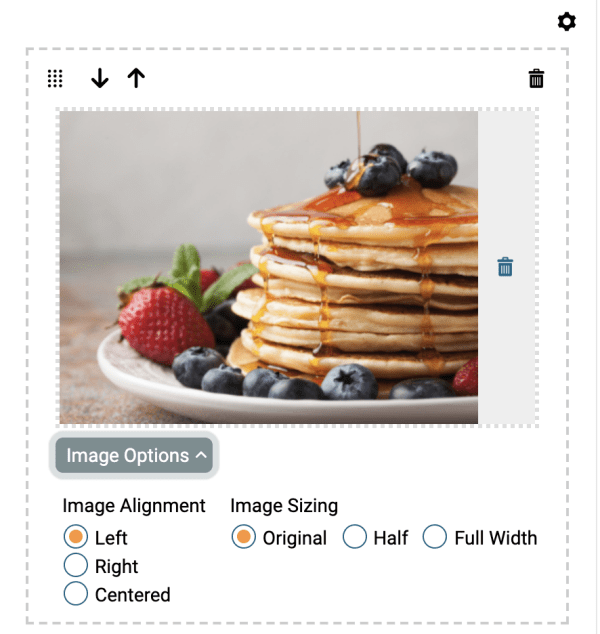
When you add an image, you will have an easy upload option that allows you to drag and drop or search for an image to add. Once you’ve add an image, there is an Image Options dropdown that gives you formatting options to customize the alignment and size.
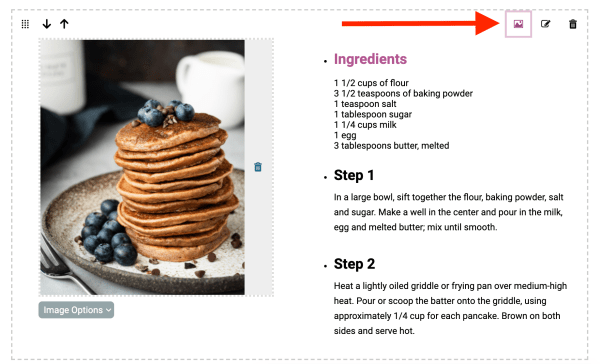
To add an image to an existing text block, click the image icon in the upper right corner. You will have the same flexible alignment and sizing options when adding an image to a text block.
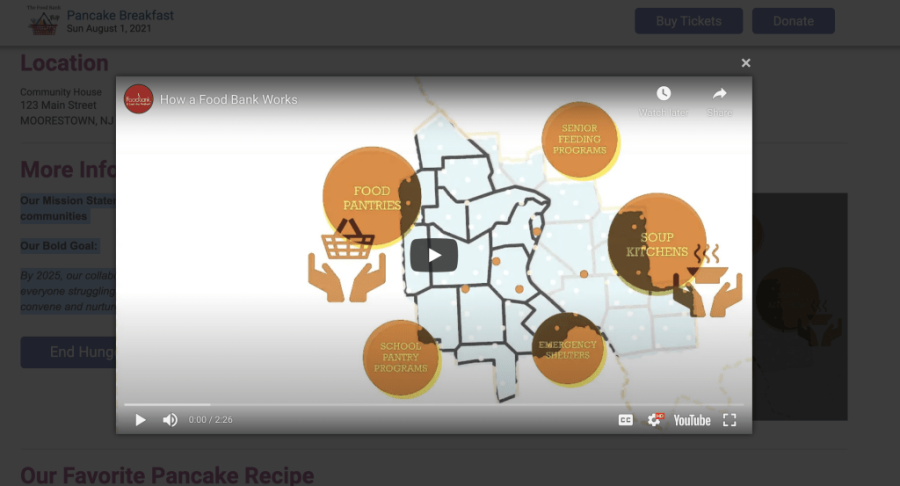
YouTube Video
To add a YouTube video to a custom section, paste the video ID in the text box.

The website builder will use the cover image from the YouTube video. When a supporter clicks to view the video, it displays nicely on the website with a pop-out viewer to play the video, and the supporter can easily return to the website when done. This is an easy way to include video content without redirecting your website visitors to a different URL.
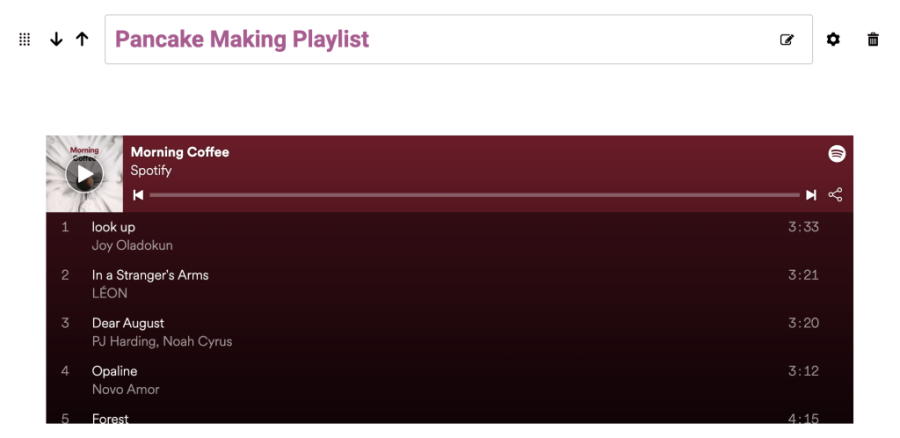
Playlists
You can also feature playlists from Spotify, YouTube or Apple Music. This is a fun way to add more interactive content to your website, especially for virtual and hybrid events. When you paste the link to a playlist, there is a nice display formatting that shows the playlist directly on your website.